I was recently asked to provide a new version of celMaker that works with Visio 2007 and Excel 2007, so I got my old VB6 code out of SourceSafe and upgraded it so that I could run it on my Vista 64 laptop too. I also decided that I would release this version to the public as freeware because I have added no new features.So, what is celMaker? And where can you download it?
Last one first … you can download it from here : http://www.bvisual.net/products/celMaker/publish.htm (under review)
Most Visio users will have the components, so you can just click the Launch link.
1. Introduction
celMaker is a developer(ish) tool for Visio which allows the most often used sections of a Visio ShapeSheet to be copied into an Excel spreadsheet, or from an Excel spreadsheet onto a Visio master.
This means that the Visio Shape designer can create one master with its Shape Data (nee Custom Properties), User Cells, Actions, Smart Tags, Controls and Connection Points, and then save this to an Excel spreadsheet for backup, verification, discussions, documentation or transfer to another Master.
The Excel spreadsheet can be created manually or by reverse engineering existing Visio masters.
celMaker is provided as a stand alone executable that requires both Visio and Excel to be running, and can be used for many different types of diagram projects.
2. Direction
2.1 From Excel to Visio
This will forward engineer a suitable Excel worksheet to selected Visio Masters.

2.1.1 Remove all existing cells first
If checked, will remove all cells for the selected ShapeSheet sections on the master, before adding any.
2.1.2 Match Master name
If checked, will only process changes from the spreadsheet to the master if the master names match.
2.1.3 Avoid Reserved words
If checked, will not process any custom properties with the following reserved names:
- Name
- OpRisk
- AvailOpt
- ActualOpt
- ActualDiscrete
- RedundancyOpRisk
- AvailDiscrete
- IsTemplate
You can edit this list on the Settings tab.
2.2 From Visio to Excel
This will reverse engineer selected Visio Masters into a formatted Excel worksheet.
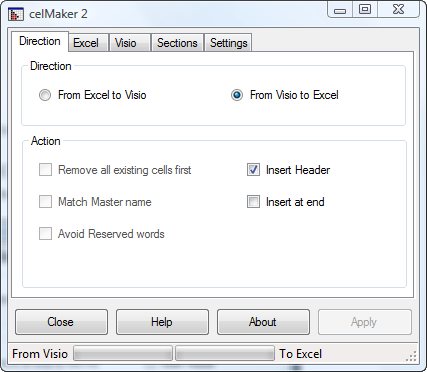
2.2.1 Insert Header
If checked, will create the headers row in the Excel spreadsheet.
2.2.2 Insert at end
If checked, will preserve any existing rows in the selected Excel spreadsheet, by adding new ones at the end.
3. Excel
Select an open Excel workbook (document) from the upper list box, and then the worksheets will be listed in the lower one.
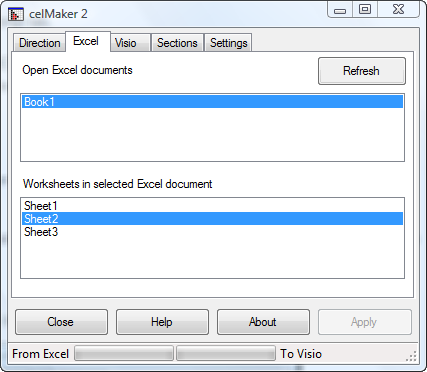
Select a single worksheet in the lower list box.
3.1 Refresh
Click this button to refresh the list of open Excel documents and worksheets
4. Visio
The Open Visio Documents panel only lists editable documents. If you want to copy from a Master on a read-only stencil, then just drag and drop it onto an editable document.
Select an open Visio document in the upper list box, then its Masters will be listed in the lower one.
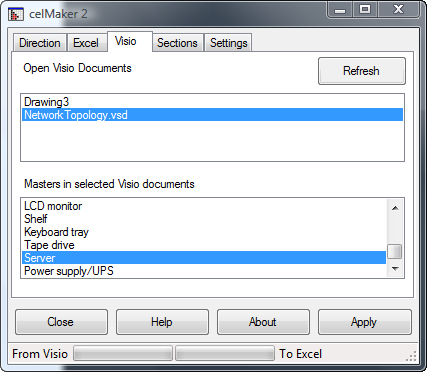
You must select one or more Visio Masters of an open Visio document.
4.1 Refresh
Click this button to refresh the list of open Visio documents and Masters
5. Sections
This tab allows the required sections to be selected for forward or reverse engineering.

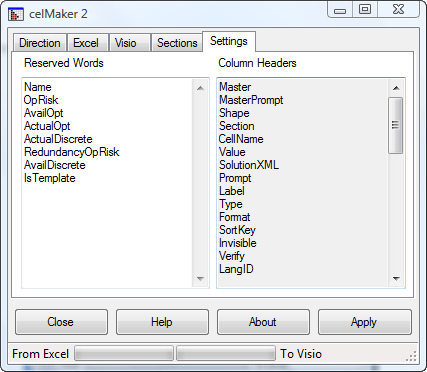
6. Settings
This tab enables you to edit the reserved words or check the column headers.
7. Close
Closes celMaker
8. Help
Opens a pdf of this file
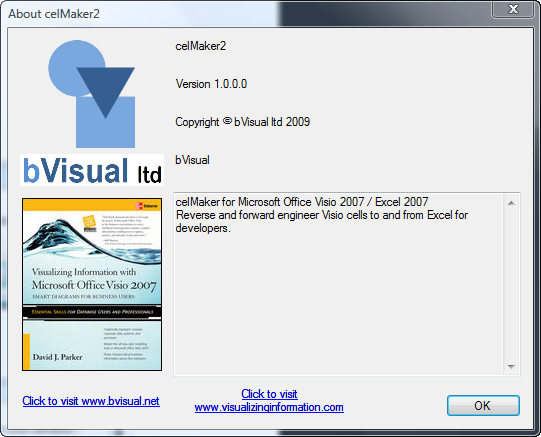
9. About
Opens the About dialog (and a shameless plug for my book!).
10. Apply
The Apply button becomes enabled when you have selected both an Excel worksheet and a Visio Master.
10.1 From Visio to Excel
If the Direction select is Visio to Excel, then you will be prompted to confirm the copy operation.

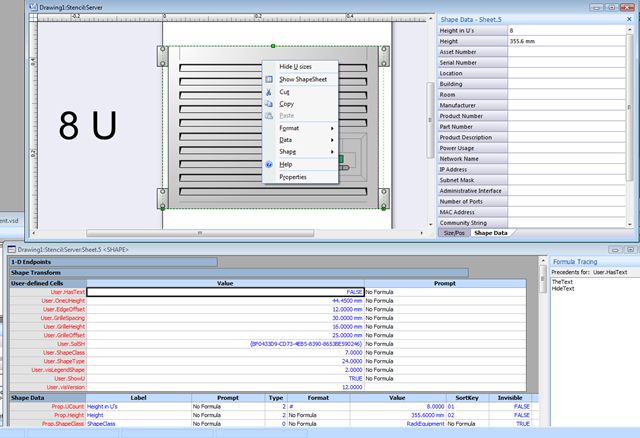
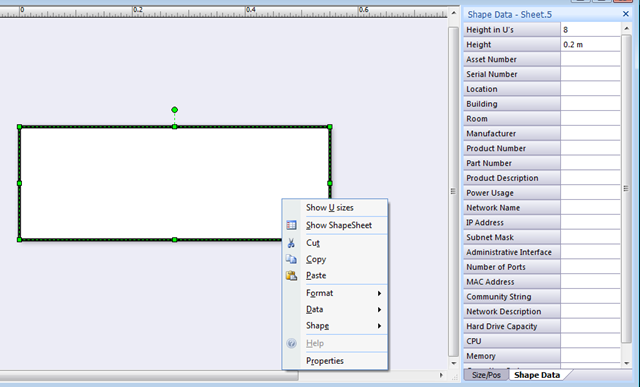
Here is the Server Master whose cells are being copied in the following example:
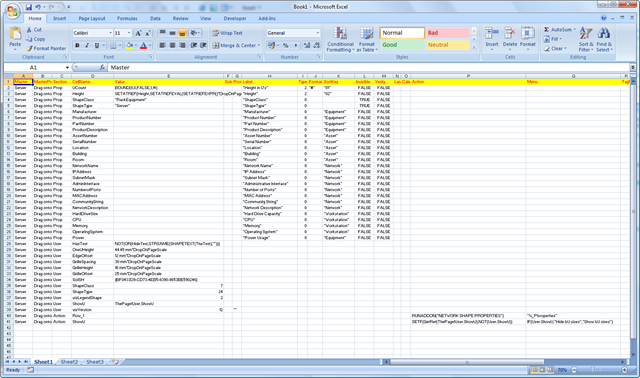
The selected section’s cells are copied to the selected Excel worksheet:
10.2 From Excel to Visio
You need to select an editable Master to copy the cells to from a worksheet.

You will be prompted to continue.

After processing, the Master will have all of the ShapeSheet sections that you have in your worksheet.
10.3 Excel Worksheet Columns
If you reverse engineer Visio cells to Excel then a row will be created in the worksheet for every cell in Visio. The source Master and Master prompt will be listed in the first two columns, with the Section and Cell name or number in the third and fourth columns.
| Worksheet Column | Visio element | Comment | Section |
| A | Master | The name of the Master that was reverse engineered. (ignored for forward engineering – to Visio) | All |
| B | MasterPrompt | The prompt for the master | All |
| C | Shape | This is either the name of the shape in the Master, or it is Sheet.0, which means it is the Master Page | Al |
| D | Section | The Visio ShapeSheet section name – Prop, User, Action. SmartTag, Controls or Connections | All |
| E | CellName | The hidden name of the cell. | All |
| F | Value | Any default value for the property or for the user-defined cell, for example. | All |
| G | SolutionXML | Valid Solution XML statement to be added to the property. (Reserved for future use) | Prop User and Connections |
| H | Prompt (Tip) | The long description of the property | Prop, User, Connections, Controls |
| I | Label | The displayed name of the property or user-defined cell. | Prop |
| J | Type | Must be, or evaluate to, a number from 0 to 7: 0=Text, 1=Fixed List, 2=Number, 3=Boolean, 4=Variable List, 5=Date, 6=Duration, 7=Currency | Prop, Connections |
| K | Format | Must be a valid format for the Type. For example, if Type = 1 or 4, then the Format should be a semi-colon separated list. Default is 0. | Prop |
| L | SortKey | Used for alpha sorting of properties in the normal custom properties window or dialogue, | Prop |
| M | Invisible | Must be, or evaluate to, 0 or 1, which will show or hide the property. Default is 0 | Prop |
| N | Verify (Ask) | Must be, or evaluate to, 1 or 0, which will prompt or not for the property when a new master instance is created. Default is 0. | Prop |
| O | LangID | Valid language ID | Prop |
| P | Calendar | Valid non-western calendar | Prop |
| Q | Action | The action to do, expressed as a valid ShapeSheet formula. | Actions |
| R | Menu | The displayed menu text for the action. | Actions |
| S | TagName | Associates SmartTag actions to SmartTags | Actions, SmartTags |
| T | ButtonFace | Must be a valid Microsoft Office button face ID (0 to approx. 7000),or empty | Actions, SmartTags |
| U | Checked | Must be, or evaluate to, 1 or 0, which will check or uncheck the menu item. Default is 0. | Actions |
| V | Disabled | Must be, or evaluate to, 1 or 0, which will enable or disable the menu item. Default is 0. | Actions |
| W | ReadOnly | Must evaluate to 0 or 1 | Actions |
| X | Invisible | Must evaluate to 0 or 1 | Prop |
| Y | BeginGroup | Must evaluate to 0 or 1 | Actions |
| Z | X | The X position of the Connection Point or Control | Connections, Controls, Scratch |
| AA | Y | The Y position of the Connection Point or Control | Connections, Controls, Scratch |
| AB | DirX | The X direction of the Connection Point | Connections |
| AC | DirY | The Y direction of the Connection Point | Connections |
| AD | XJustify | Must be 0 = left, 1 = center, or 2 = right. | SmartTags |
| AE | YJustify | Must be 0 = top, 1 = middle, or 2 = bottom | SmartTags |
| AF | DisplayMode | Must be 0 = Mouse Over, 1 = Shape Selected, or 2 = Always | SmartTags |
| AG | Description | Any text | SmartTags |
| AH | Disabled | Must evaluate to 0 or 1 | SmartTags |
| AI | A | Reserved for future use | Scratch |
| AJ | B | Reserved for future use | Scratch |
| AK | C | Reserved for future use | Scratch |
| AL | D | Reserved for future use | Scratch |
| AM | AutoGen | A value of 1 indicates that the connection point is generated automatically | Connections |
| AN | XDyn | X coordinate of the control | Controls |
| AO | YDyn | Y coordinate of the control | Controls |
| AP | XCon (XBehavior) | X behavior of the control | Controls |
| AQ | YCon (YBehavior) | Y behavior of the control | Controls |
| AR | CanGlue | Determines if the control handle can be glued | Controls |
See Microsoft Office Visio 2007 SDK Documentation for more information on these elements.
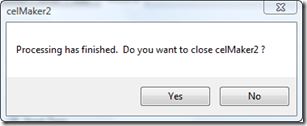
10.4 Processing has Finished
Once you have finished an operation, you will be prompted to close celMaker, or not.