

I have written many add-ins for Visio over the years, some for private clients for use in-house, some as products for public release by my clients or by me, and some just to help me with my day-to-day Visio development tasks. The ease of installation is always an issue, and I have been using a digital certificate to guarantee its authenticity in almost all of these scenarios. I have also included licensing code from a third-party for some of my own products, but have been aware that the third-party product I have been using is not ideal because it needs its own registered component on the client machine. So, when a client asked that I use Advanced Installer to create the installation setups so that their licensing system could be used, then I was (and still am) all for it because it could become a better method for myself. However, there are some issues that I am overcoming through this transition ….not least that an apparently correctly assigned digital certificate was actually not valid.

My previous setup and deployment projects in Visual Studio created an msi file that did not get digitally signed, although the add-in dll wss signed with my digital certificate. Moreover, I used the Visio Solution Publishing Tool from the Visio SDK to modify the msi file so that the Visio specific content would become visible in the Visio UI. Everything was hunky-dory. Also, I had to include some packaged OnInstall code that would register the COM based licensing component with elevated permissions.
Now, moving to Advanced Installer (AI), I could replace the COM licensing component with their methodology which involves copying their Trial.dll, from their installation folder, and applying my digital certificate, to install it in the same target folder as my digitally signed add-in dll. The AI wizard and examples do not cover all of the aspects of the setup that I required, so I had some learning to do. ***UPDATE Sept 2020 : It does now! ***
One trick I had to learn quickly was that I had to run the AI build at least once to create the modified Trial.dll and then copy it to place in my bin folders, if I wanted to ever attempt to run the code from Visual Studio with licensing activated.
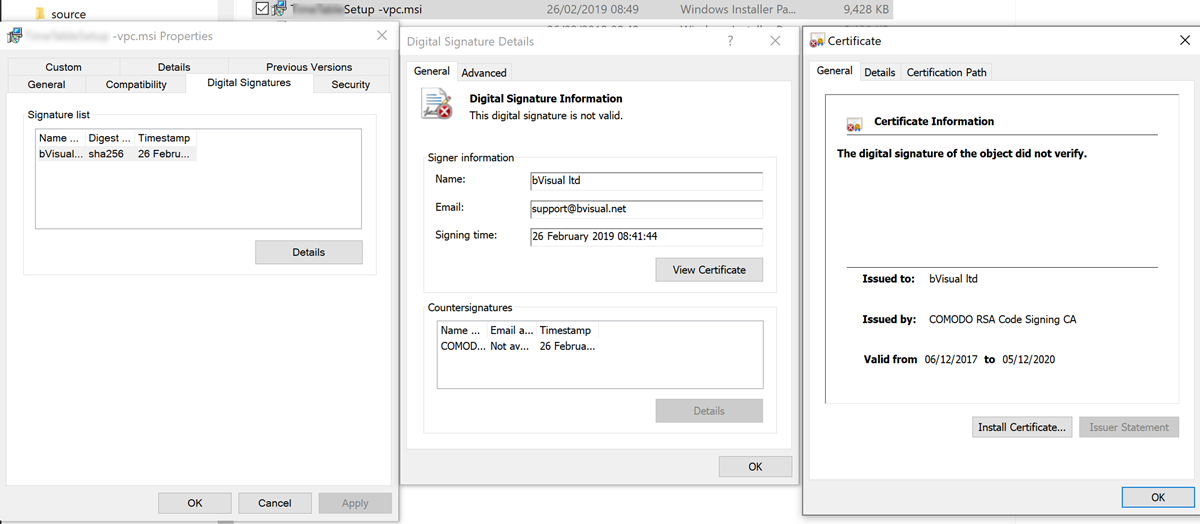
Okay, so I now had add-in code that I could debug and run on my development machine, and I could build installations for that appeared to work … however I got reports from my client that Windows SmartScreen was warning that the code was not signed. At first, I was confused because I was installing fine on my machines, and both the add-in dll and Trial.dll were both correctly signed.
I got confirmation from AI and Comodo that I was doing it correctly when I submitted my methodology to them. However, they and I missed one important part of this mystery .. I was still using the Visio Solution Publishing Tool to modify the msi so that the Visio elements would be surfaced in the UI. Duh! This was causing the digital certificate on the msi file (which I never previously signed) to be invalid.
So, the solution is to add the PublishComponent rows and CustomAction rows into the AI project, much in the same way as Nikolay Belyh had worked out when he switched to using WiX to create an installer for Visio. That was necessary for a while because Microsoft removed the Setup and Deployment projects from Visual Studio, until public clamour forced them to add them back in. Chris Hopkins of Microsoft (and a Visio whizz-kid in a previous life) wrote about this too.
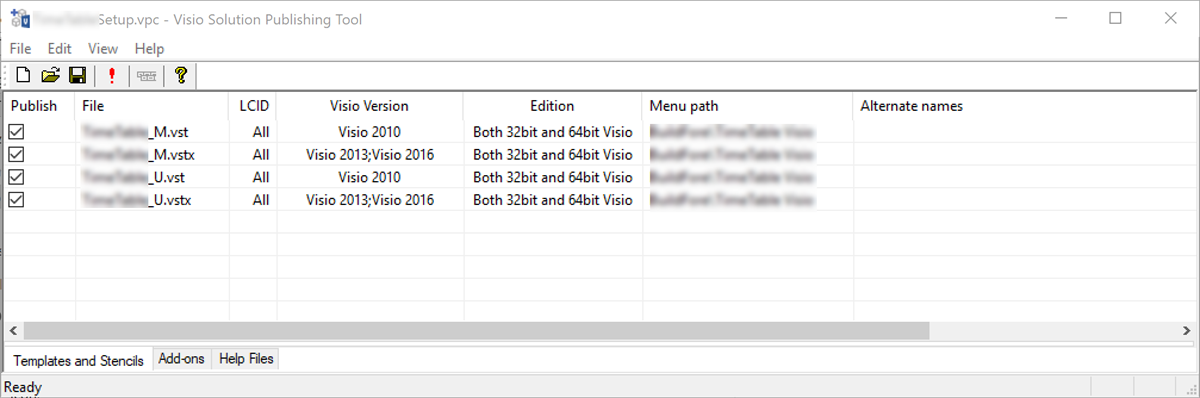
The Visio Solution Publishing Tool provides list of files that it finds in the msi, which you can then modify to specify when and how the Visio files should appear in the Visio UI.
For example, the Menu Path can create a Template folder in which to display the Visio template with a longer, more descriptive, name. There is a naming convention for Visio templates that denotes whether they are US Unit (_U) or Metric (_M). The Visio file format changed after Visio 2010, and the Visio installation could be 32 or 64 bit. Moreover, Visio files can unique or named specifically for different langues, but in the example below, I have set the same Visio file to be available for All languages.

AI includes a handy Diff MSI File button on the Table Editor ribbon, so I was able to compare the changes made by the Visio Solution Publishing Tool to the msi with one that was unchanged. Note that the four rows in the Visio Solution Publishing Tool became six rows in the PublishComponent table.


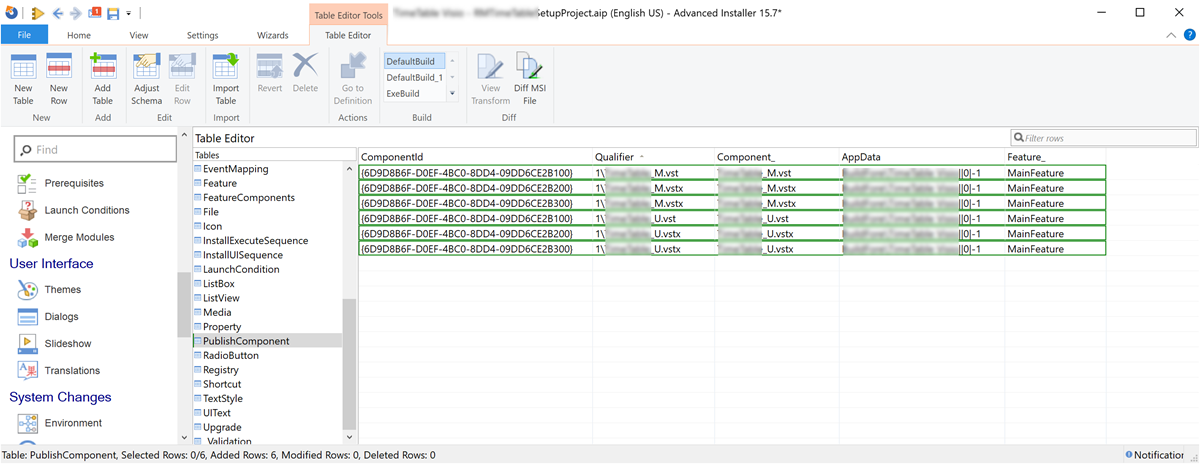
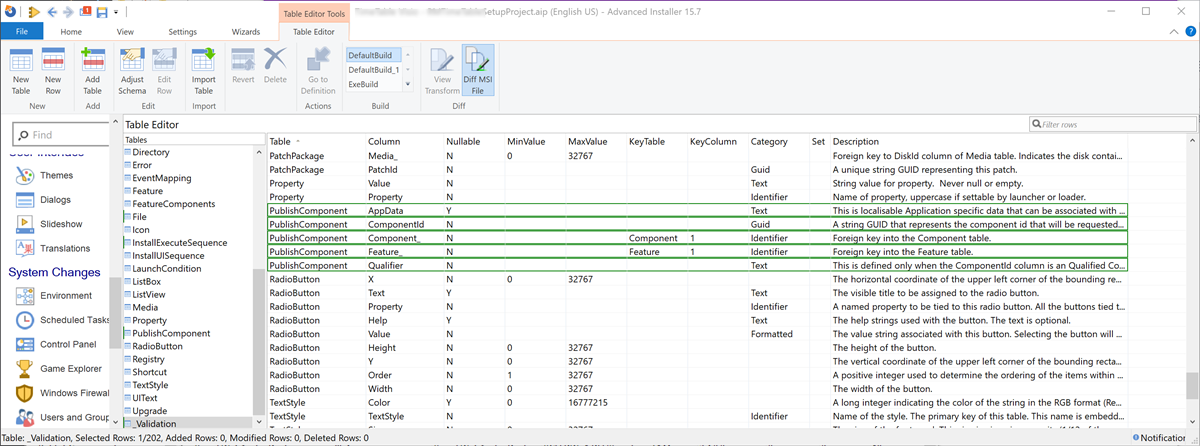
All but the _Validation rows were added by the Visio Solution Publishing Tool, so these were the table entries that I need to add to AI.
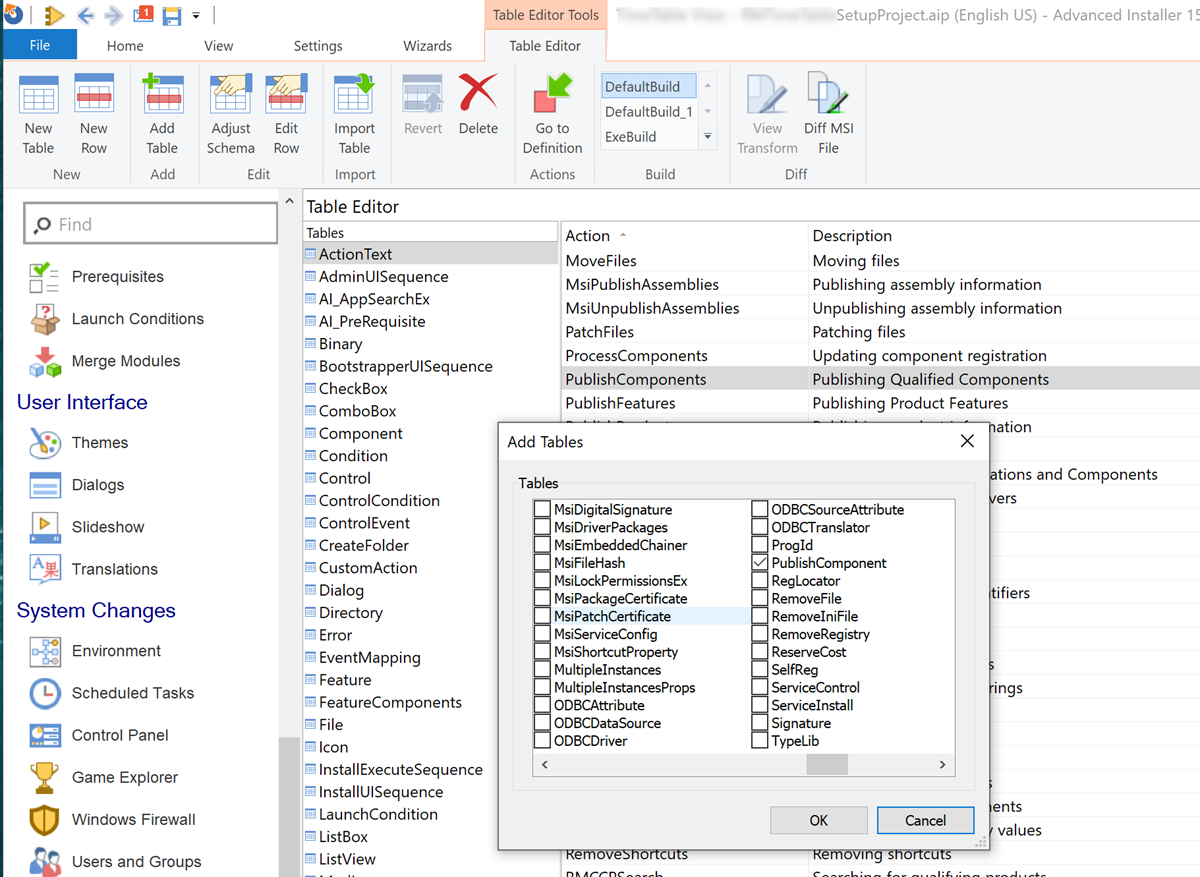
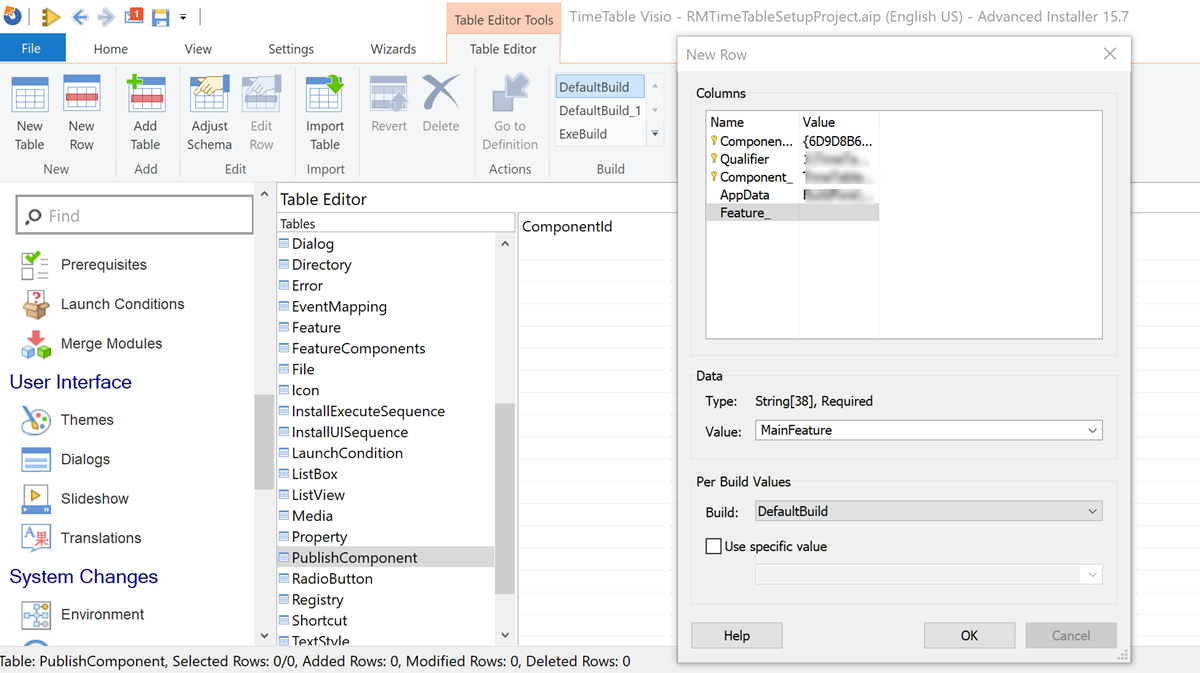
PublishComponent
Since this table did not exist initially, then the table had to be added before any rows could be inserted into it.


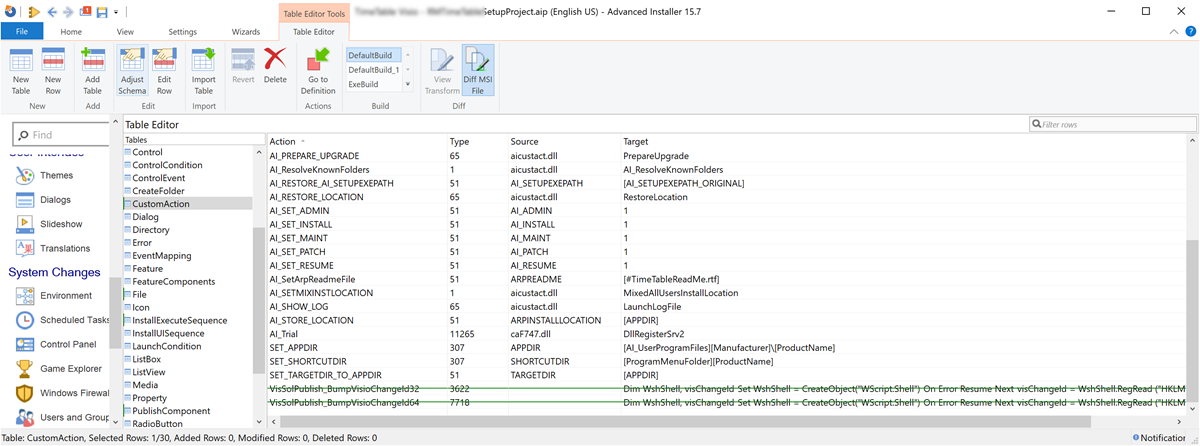
CustomAction
Inline code script cannot be added directly into the CustomAction table row, so they must be added in the Custom Actions folder using the Add Custom Action / Execute inline script code option. Infact, I need to add one for 32-bit setup, and one for 64-bit setup (which has the Condition=VersionNT64)

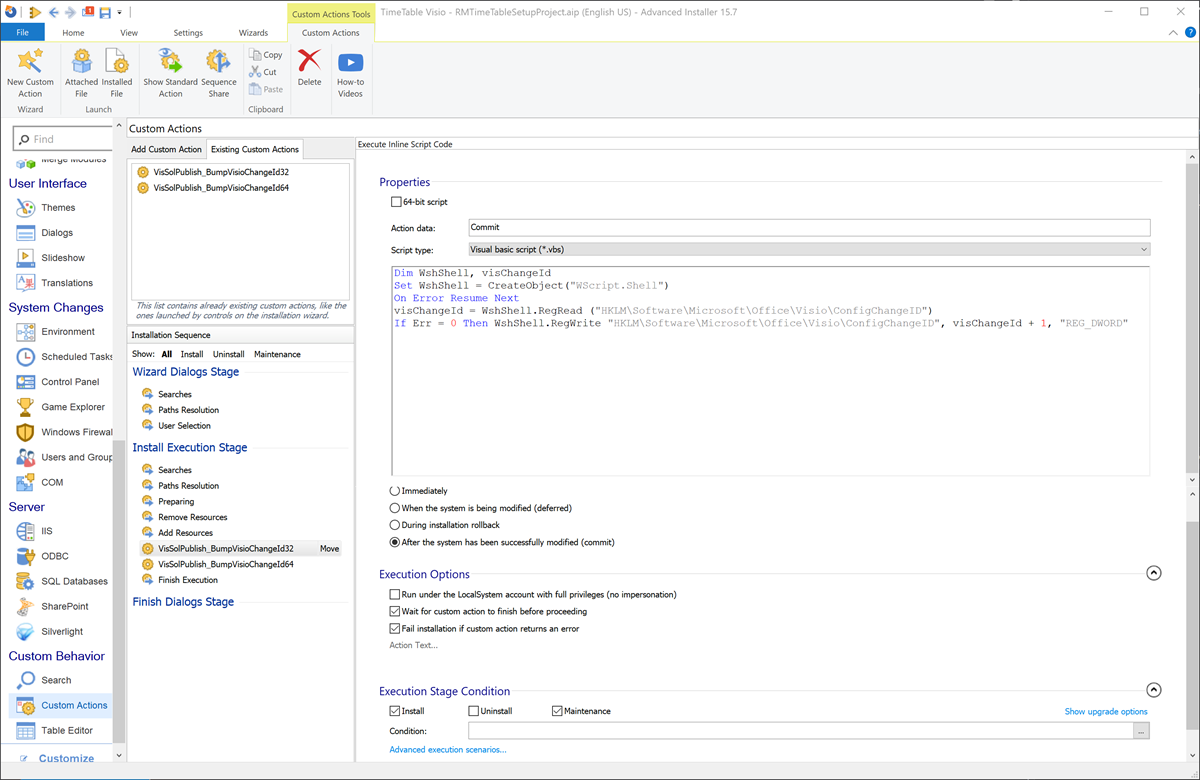
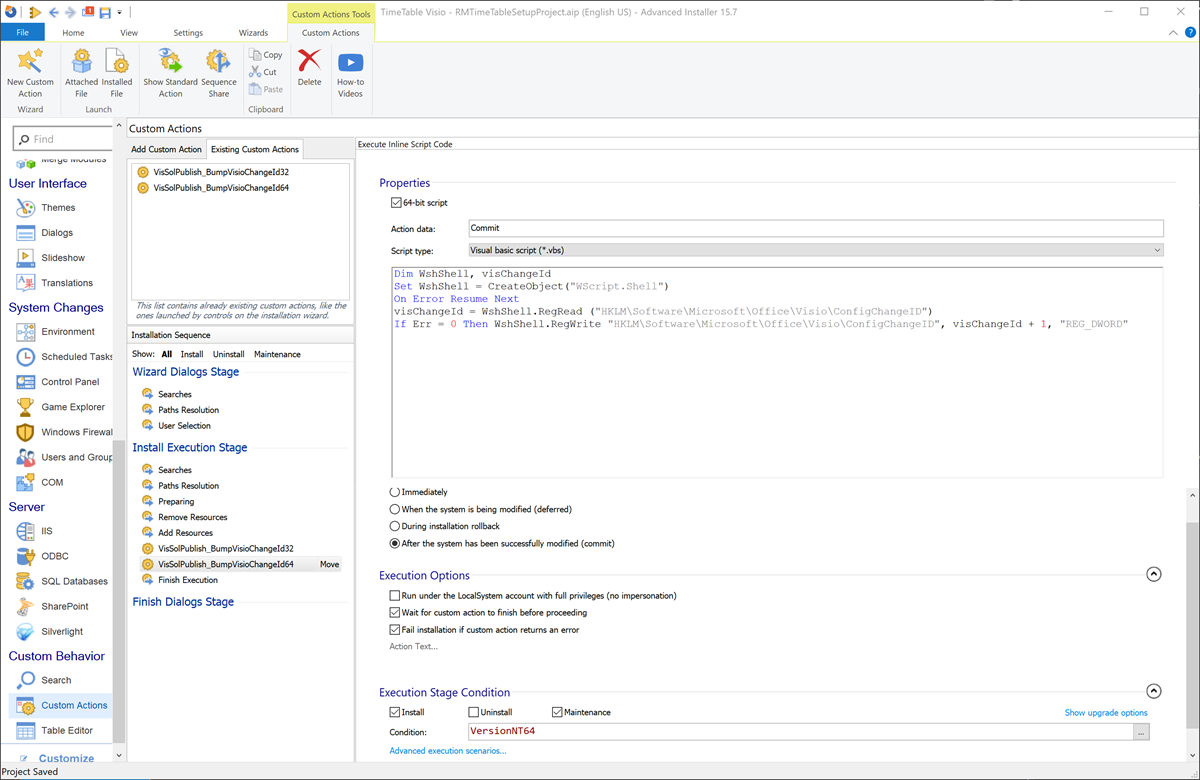
The same script was added to both the VisSolPublish_BumpVisioChangeId32 and VisSolPublish_BumpVisioChangeId64 entries.
Dim WshShell, visChangeId
Set WshShell = CreateObject("WScript.Shell")
On Error Resume Next
visChangeId = WshShell.RegRead ("HKLM\Software\Microsoft\Office\Visio\ConfigChangeID")
If Err = 0 Then WshShell.RegWrite "HKLM\Software\Microsoft\Office\Visio\ConfigChangeID", visChangeId + 1, "REG_DWORD"
These actions were automatically added to the CustomAction table, which I edited to set the Type = 3622 for VisSolPublish_BumpVisioChangeId32 and 7718 for VisSolPublish_BumpVisioChangeId64.
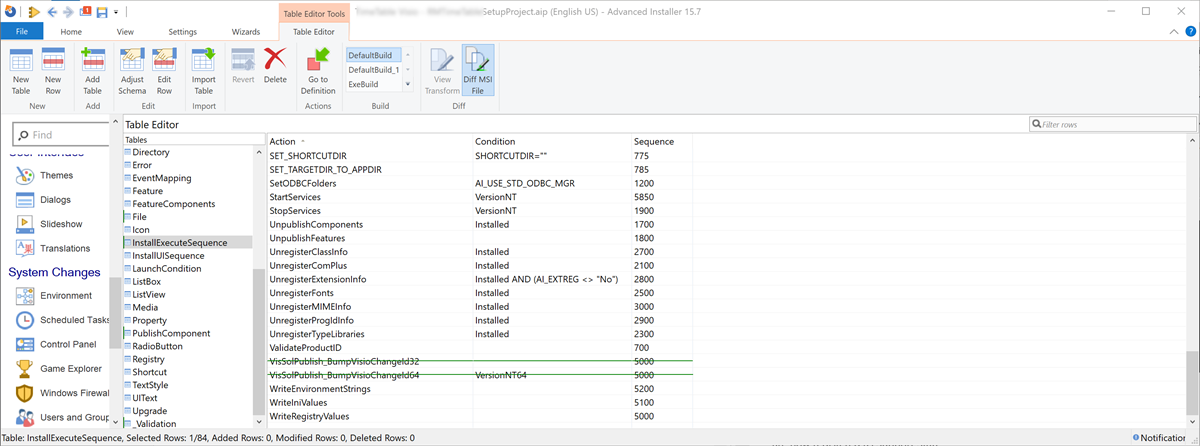
InstallExecuteSequence
I returned to the InstallExecuteSequence table to edit the Sequence to be 5000 for both rows.
Conclusion
Advanced Installer is better than my previous method for creating licensed, digitally certified VSTO add-in setups, and I will continue to use it. However, I will probably run the Visio Solution Publishing Tool initially, and then use the AI Diff MSI File feature, just to check what rows I should add into the AI project.