

I was recently on holiday but needed to update an installation of Visio Templates and Stencils for all languages. I use Advanced Installer in Enterprise mode so that I can edit the PublishComponent table like I have described in my earlier article ( see Using Advanced Installer with Visio VSTO Add-Ins – bVisual )Unfortunately I only had my travel laptop and could not refer to previous projects. Instead I referred to an excellent article on UnmanagedVisio, and tried the suggested Component IDs for All Versions of Templates and Stencils
However, these do not work for me using Visio Plan 2. Nothing showed up in the Visio UI. So, this article describes how it works for me using Advanced Installer.


Notice in the articles’ table that there was a sequence for Visio 2007, 2010, and 2013 with the last four digits B000, B100, and B200 for Templates and B101, B102 and B103 for Stencils. So, the logical next ones in the sequence for Visio 2016 would be:
For templates: {6D9D8B6F-D0EF-4BC0-8DD4-09DD6CE2B300}
For stencils: {6D9D8B6F-D0EF-4BC0-8DD4-09DD6CE2B301}
… and these are the ones that work for me in Visio Plan 2!
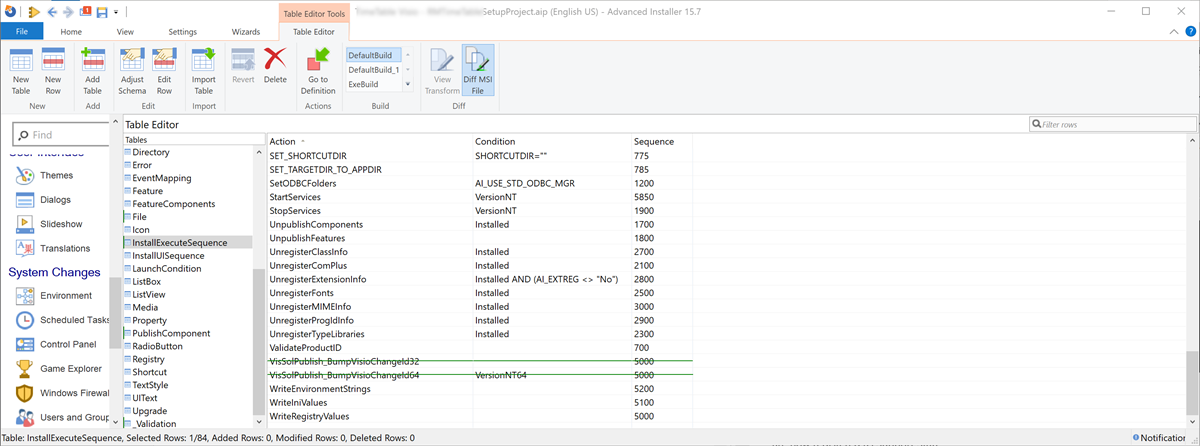
Firstly, each of the Template and Stencil files must have their own row in the Organization entries. Notice that this is the actual file name, and the Directory that they will be installed into. They get their own unique GUID too. These can then be checked in the Table Editor \ Component table.
Then each of the Templates and Stencils must have an entry in the Table Editor \ PublishComponent table. The AppData property provides the opportunity to provide a category for the templates and stencils, and to provide a more friendly name to display in the Visio UI.
| ComponentId | {6D9D8B6F-D0EF-4BC0-8DD4-09DD6CE2B300} for Templates {6D9D8B6F-D0EF-4BC0-8DD4-09DD6CE2B301} for Stencils |
| Qualifier | 1\<File Name>, where 1 means all languages |
| Component_ | The file name in the Component table |
| AppData | <Category>\<Display Name>||0|-1, where 0 means the number of “quick shapes” and -1 means for install for 32 bit and 64 bit. |
| Feature_ | MainFeature |
Although we can create rows that will work in 32 bit or 64 bit now, the Advanced Installer project has to be set for 32 bit or 64 bit Visio. Microsoft 365 switched from defaulting to 32 bit to 64 bit Office apps a few years ago, so it is becoming increasingly rare to encounter 32 bit Visio installations. Therefore I normally create a 64 bit project first, then create a duplicate project and make the necessary changes to mark it as 32 bit. The minimum for this is found in the Package Type in Install Parameters \ Installation Options. In addition, I set the Organization \ MainFeature \ AI_ExePath to 64-bit Component or not.
Related Articles
Refreshing the cached installed files of Visio
I have created many Visio solutions over the past 25 years and used a number of methods of creating an installation that includes Visio templates and stencils. I have just wasted many hours trying to debug an installation created with Advanced Installer until I realised that the problem was that Visio was not properly updating…


New Requirement for VBA Digital Signatures in Visio
Like most developers, I have to buy a new digital certificate every 3 years to sign my Visio add-ins and VBA projects. Usually that means verifying my bone fides, paying the fee and downloading the certificate, but security has been increased, and now, like everyone else, I have to use a USB key with it…


Advanced Installer now Supports Visio VSTO Add-Ins
Advanced Installer now supports creating VSTO Visio Add-Ins installation projects using the Office Add-Ins wizard! This is great news for those of us who are still having to create VSTO Add-Ins, especially since Visual Studio does not include Setup & Deployment projects (again). (more…)

Using Advanced Installer with Visio VSTO Add-Ins
Read how I used Advanced Installer with my Visio VSTO add-in

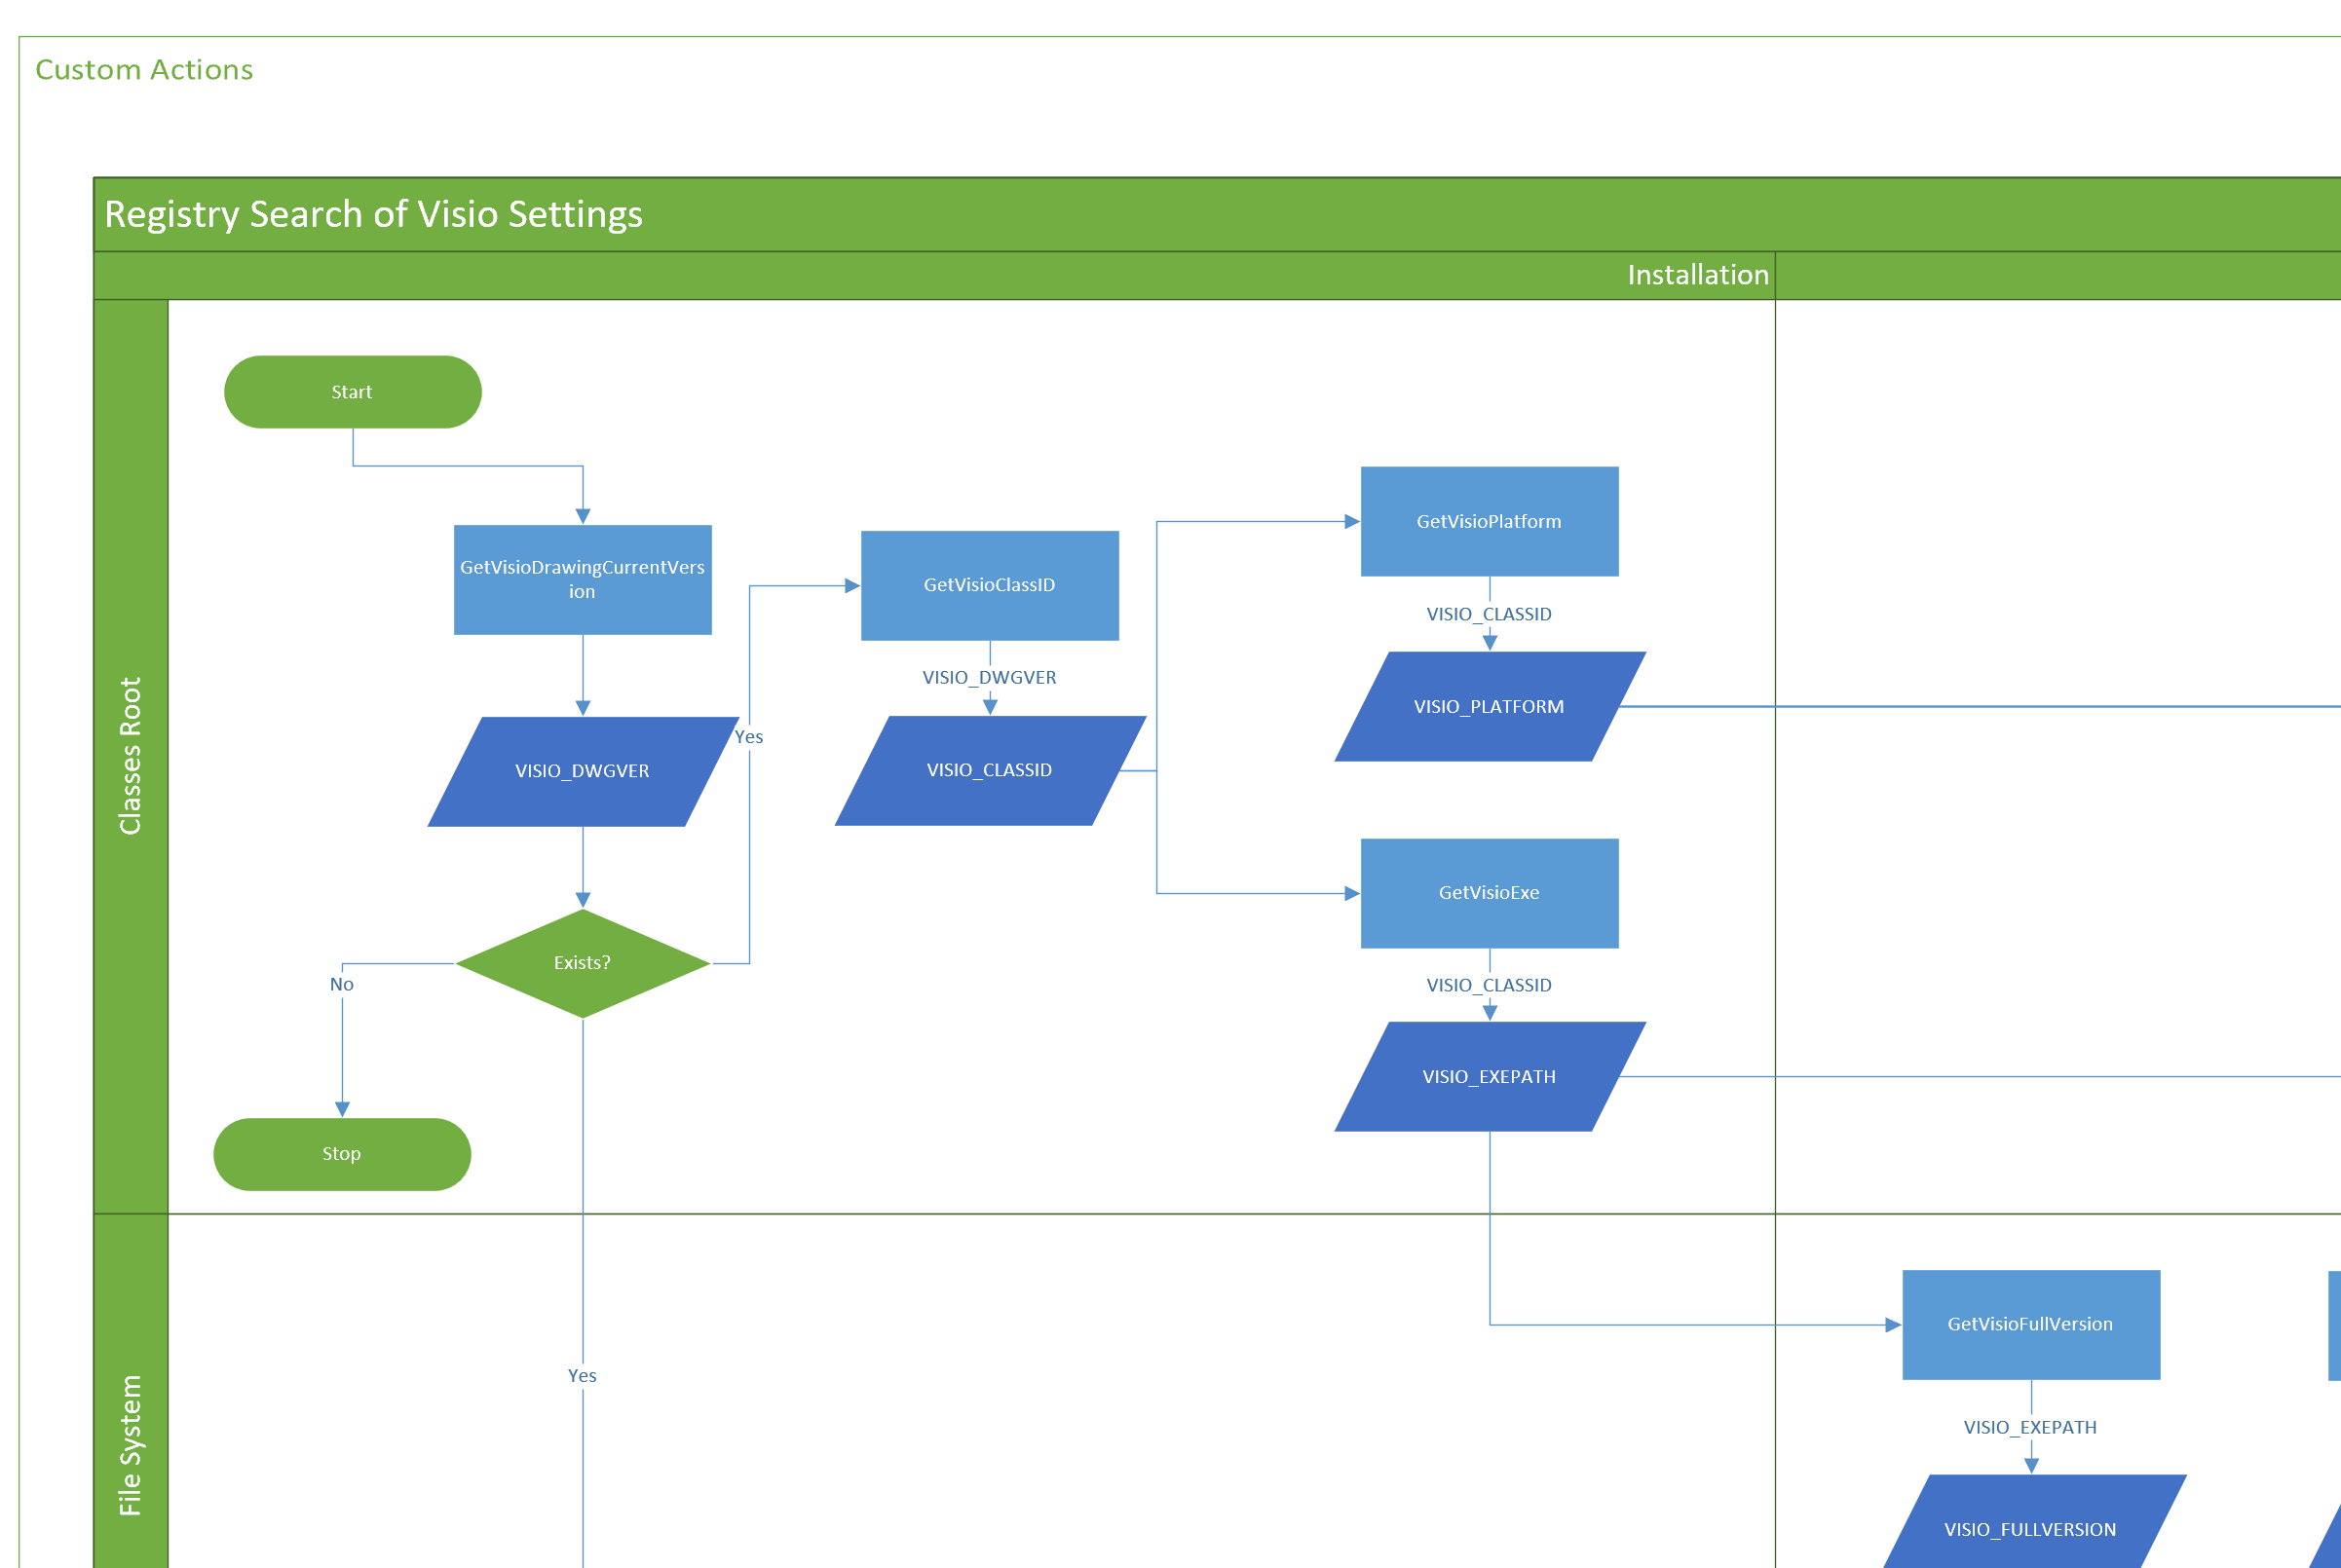
Reading the registry for Visio settings
Learn how to extract installation Visio settings from the registry with code
Checking the Bitness of Microsoft Office, Visio Viewer and Visio
Visual Studio setup an deployment projects require the target “bitness” of target Windows operating system to be set. This means that I have to create two installation files, one for 32bit and one for 64bit Windows for my Visio add-ins, for example. The bitness of an individual Visio application can be checked from the File…